Ottomapay Mailbox
Powerful control center for your transactions.
Beautiful, fast and modern way to manage your payments.
$ Create and receive payments here

Monitor your incoming payment notifications from here in real-time
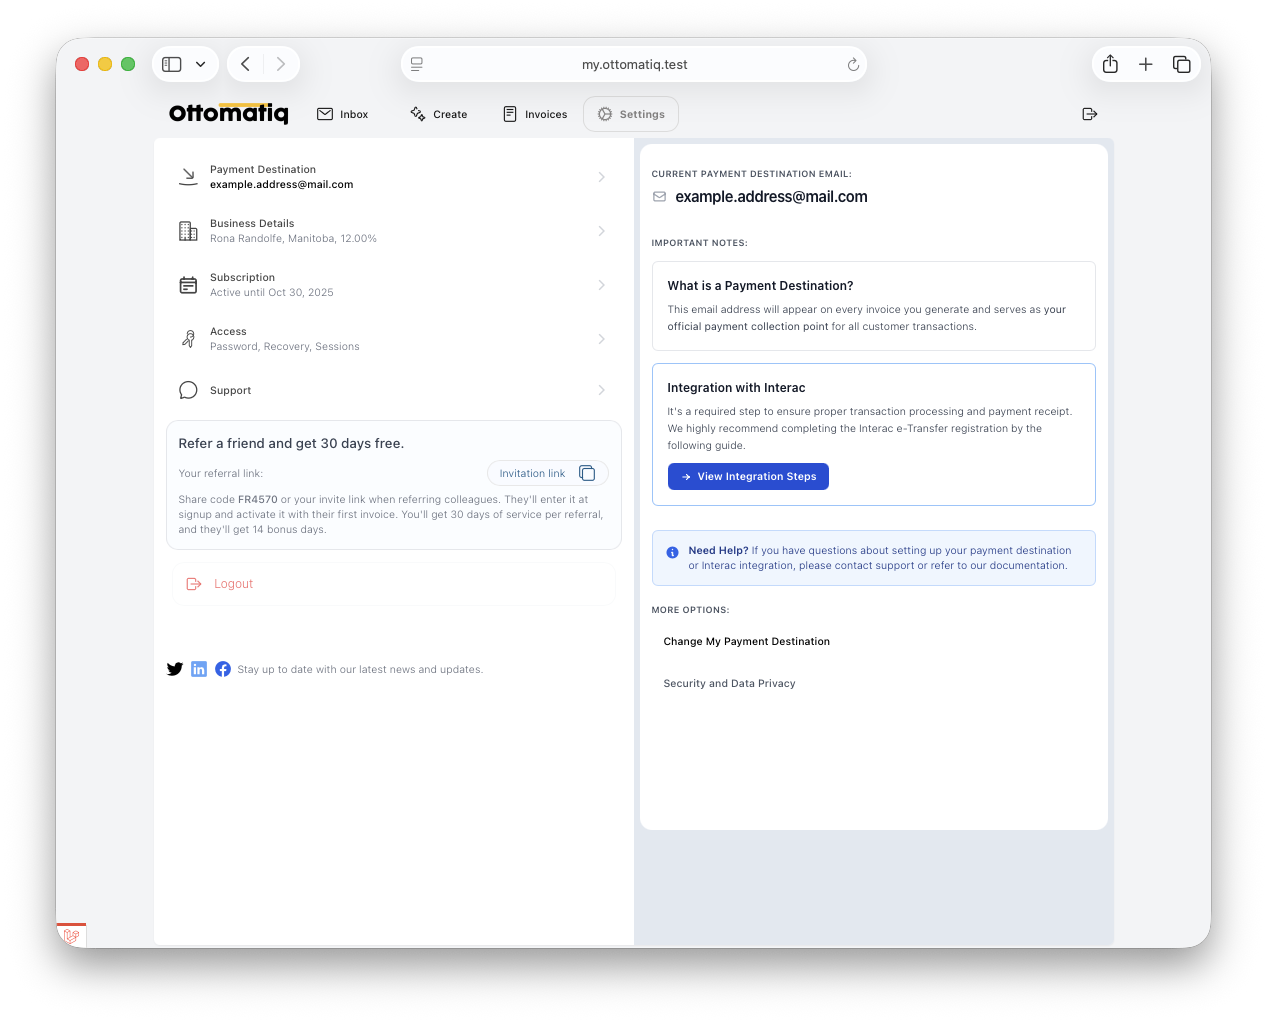
Auto-Deposit integration
Client payments get deposited directly into your bank account. Ottomatiq provides you with a free email address to help organize your payments, or use your own email address.
Forward & Automate your emails
If you already have a preferred email address to receive Interac e-Transfers - we offer the option to keep your email address while still using our payment matching engine.
Payments matching engine
Ottomatiq constantly monitors incoming payments, automatically matches them to your open invoices and can be set to immediately send a beautiful, branded receipt.
Your Own Secure Payment Portal
OttomaPay payment gateway allows you to accept payments online
securely and efficiently.
With OttomaPay, you can easily connect your client payment
with your existing auto-deposit email, providing a seamless checkout
experience for your customers.

Invoicing
Manage your invoices effortlessly
Streamline your billing process with an intuitive invoice management system that takes you from client setup to payment confirmation in just a few simple steps.

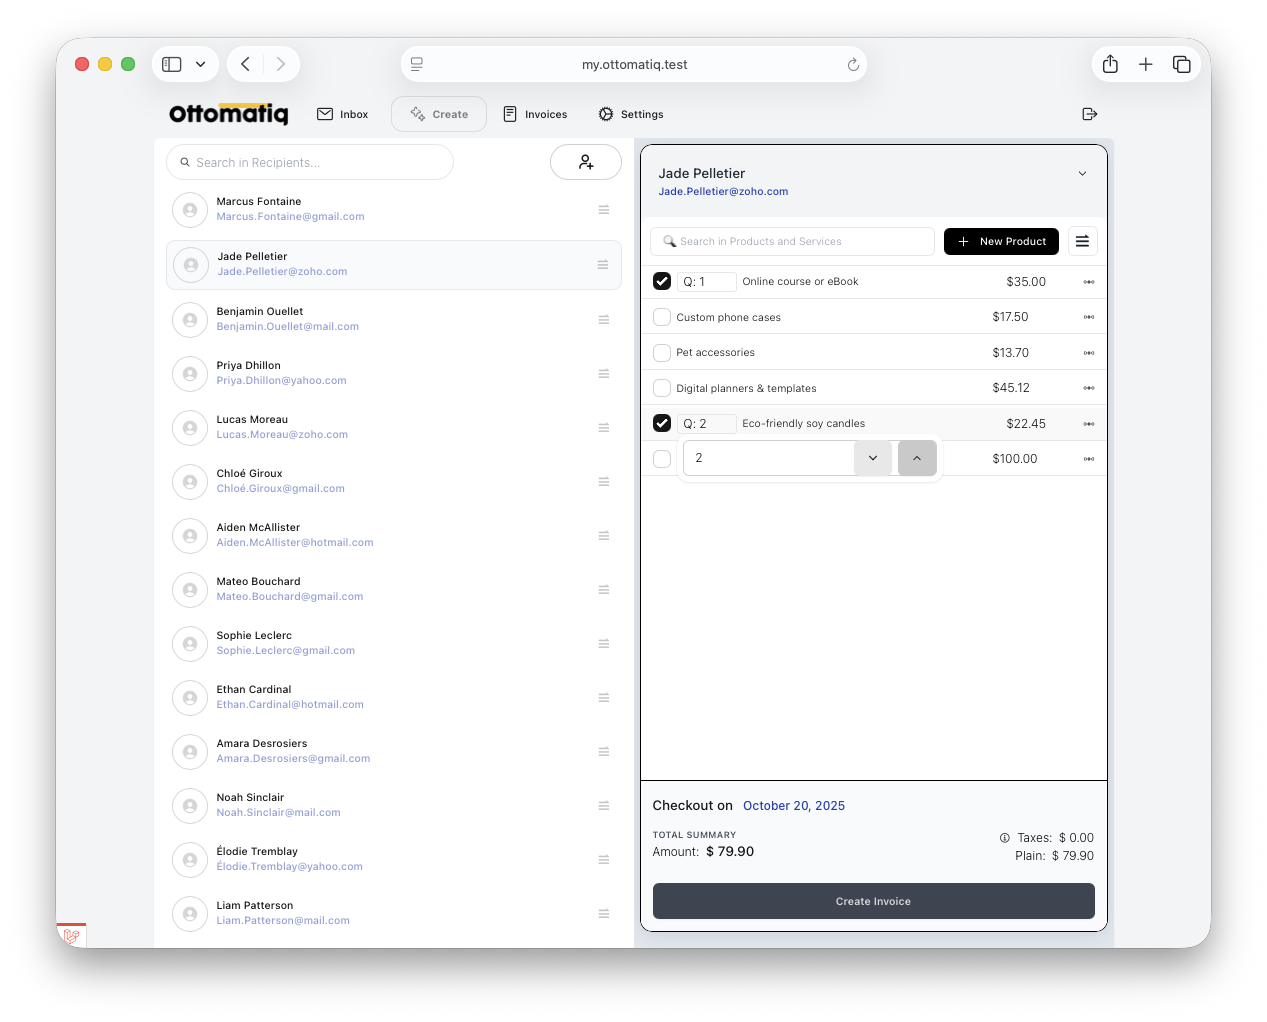
Create a Client
Your Invoice Journey Made Simple
Start from heading to the "Create" section
— your launching pad.
Set up your client by dropping in their details.
Invoice Creation
Add your services, pick the products
you want to include, and watch everything come together.
Finalize your new invoice by hitting "Create Invoice" — and that’s it! Your first invoice is ready to go.
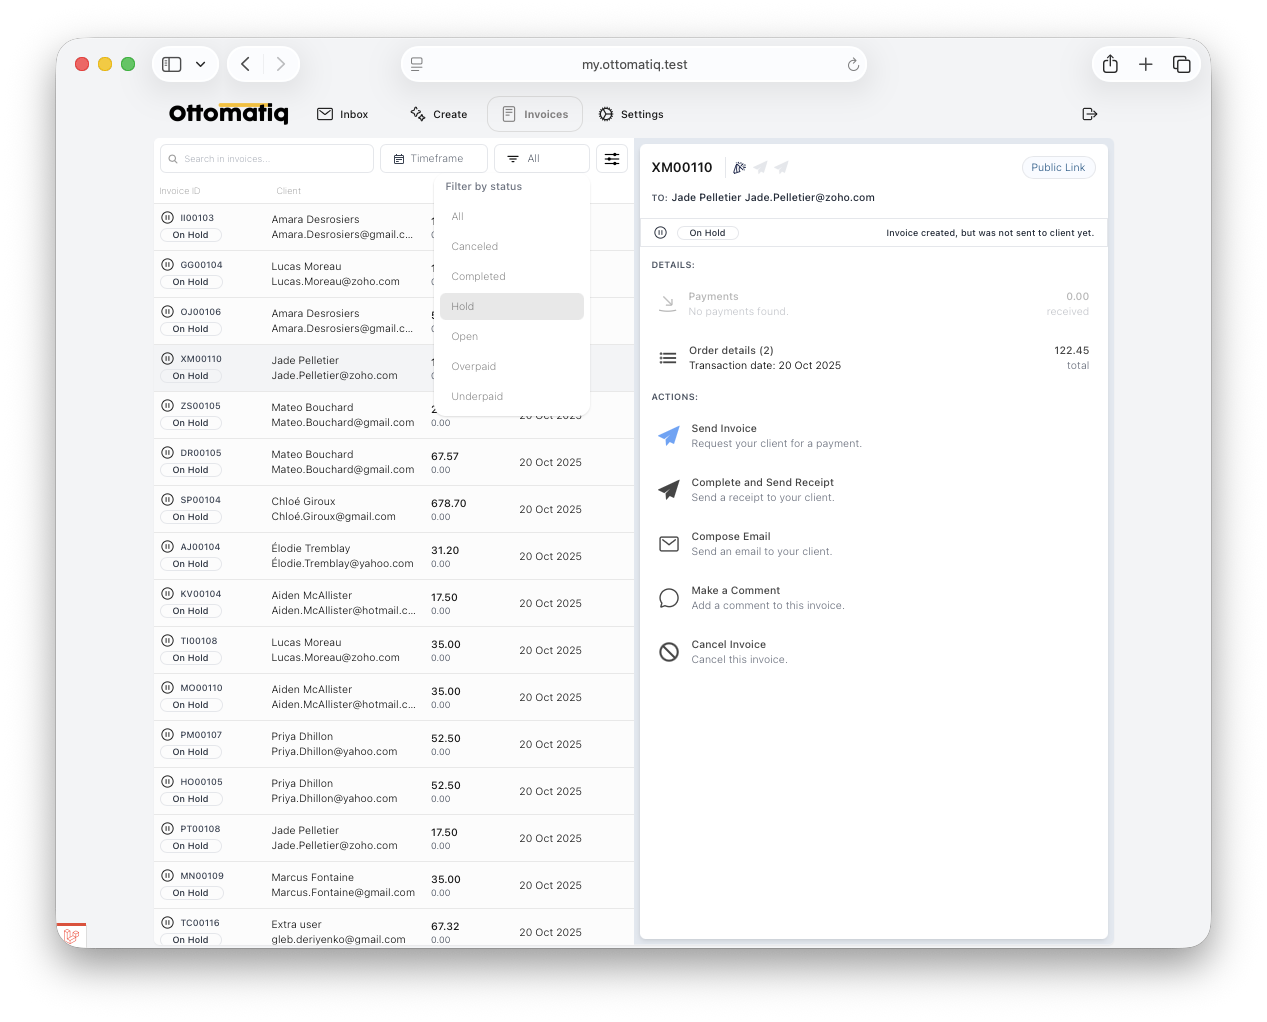
Invoice Management
From the Invoice, you can easily manage all aspects of your billing process.
Send Invoice
It will notify your client via email with a new payment request.
Send Receipt
Whenever it's time to complete a payment, it will provide a payment confirmation to corresponding recipients.
Cancel Invoice
Mistakes happen. Easily cancel any invoice before it's paid.
Security Measures
Our commitment to protecting your personal information through comprehensive privacy practices
PIPEDA Principles
Ensure personal and client information is collected, used, and disclosed only for purposes that are clear, specific, and necessary for the intended business purpose.
Knowledge and Consent
All communications are sent with the individual's knowledge and consent.
Zero Storage
No storage of banking credentials or information.
Security Audits
Regular security audits and updates.
Committed to maintaining the highest standards of privacy and data protection