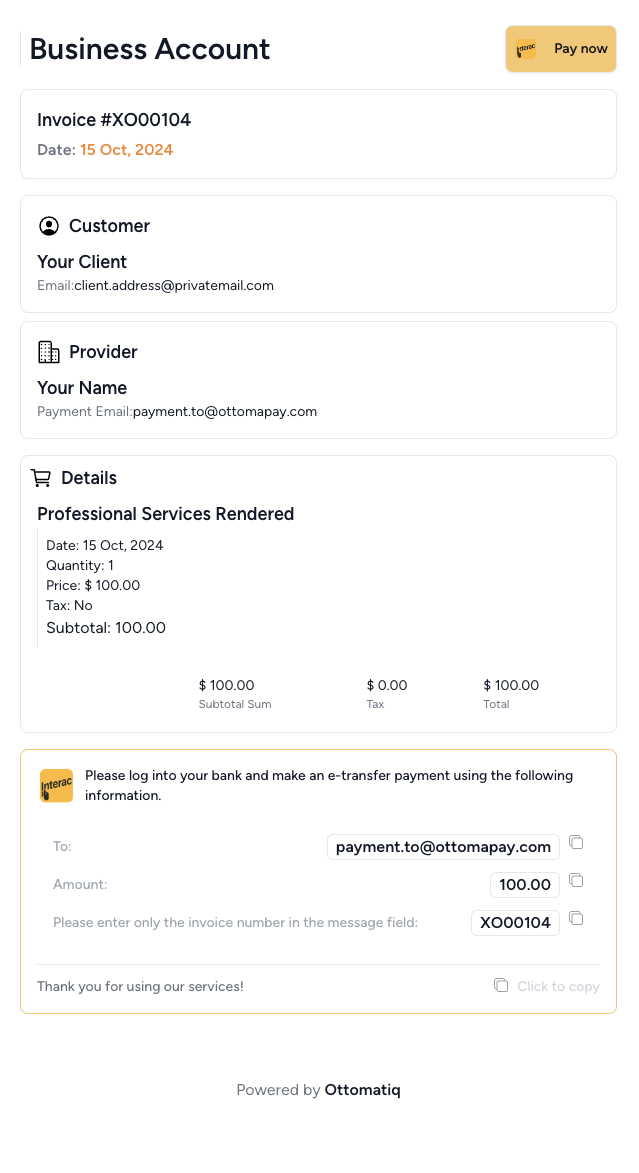
Follow along with the guide to learn how easy it is to create your first invoice and send it to your client.
In order to send an invoice, you need to create a client first.
All you need is their name and email address.
Navigation Tip: To create a new client,
go to the "Clients" tab and then click on the button.
Clients will appear as a list. Click on the client to view their details.
Productivity Tip: To rearrange the list use the drag and drop feature starting from the right side of the client's name where the corresponding icon is located.
Add a serviceWhen client selected, the charging section will appear by default. Click on the "Add Product" button to start placing new items into the charging section.
Minimal information required is the name of the service and the price. You can also check tax rate to be applied to the service. It will be calculated automatically based on your settings.
Invoice creationCheck the box next to the services you want to invoice. When you are ready, click on the "Create Invoice" button.
Fill in the invoice Date detail to keep track of the service date.
Congratulations! You are now ready to send the invoice to your client!
Click on the "Send Invoice" button in order to notify your client about the new bill they have to pay.
In some cases it might be useful to instantly send a receipt to your client. (for example, when the payment was made in person). Click on the "Send Receipt" button to do so.
Productivity Tip: You are able to preview the invoice before sending it. Click on the "Preview" button to see how the invoice will look like.
Once the invoice is sent, your client will receive an email with the invoice details.
They will be able to view the invoice and download it as a PDF file.
At this point Ottomatiq starts monitoring the payment status for you.
Productivity Tip: To preview the invoice from your client's point of view, click on the "Public Link" button at Invoice Details which will navigate you to the invoice landing page.

Your client will receive an email with the invoice details and a link to pay the invoice.
They will be able to pay the invoice using Interac e-Transfer.
Once the payment is made, Ottomatiq will automatically match the payment with the invoice and prepare a receipt for your client.
Productivity Tip: In case, you have "Automatic receipt sending" enabled, the corresponding email will be on it's way to your client.
The match is based on several factors, such as the amount of the payment, the sender's email address, and the invoice number mentioned in "Message field".
It's up to you to manually match the payments with the invoices or make an additional relation of new payer with the existing client for future payments.
That's it! Your first invoice were sent and paid!
Learn how Ottomatiq is working to provide Canadians with comprehensive control over their digital transactions.
Check out our FAQ for more information.
Learn moreIf you already have Interac e-Tranfer enabled, you can check out the guides for your email provider below:
Invoices have different statuses that indicate the current state.
The status of an invoice could be changed over time based on the manual actions or the email analysis system.
The initial status of an invoice upon creation. It indicates that the invoice has no bill sent to client and no payment is expected.
This status indicates that the invoice has been sent to the client and payment is expected. It awaits an Interac email notification to be resolved.
Tip: Please, be aware that you are able to cancel or to complete invoices manually at any time.
This is an irreversible status that can only originate from an 'Open' invoice status. It indicates that the invoice has been canceled, and no payment is expected. If the invoice email was sent, a notification about the cancellation will be sent to the client as well. This status is used to halt any further actions on the invoice and close it out in the system.
This is also an irreversible status that follows the "Paid" status. It indicates that the payment process is finalized, a receipt has been sent to the client, and no further actions are required on this invoice.
These markers are used to provide additional information about Open invoices statuses.
They are based on the payment amount and the invoice total requested amount.
These flags indicate that the invoice has payments attached, but the amount paid does not match the requested amount on the invoice.
: This flag indicates that the invoice has been paid in full. The best approach is to move this king of invoice to the "Completed" status, so the client can receive a receipt.
Know more about the team behind Ottomatiq and the mission we are on.
Check out our About page for more information.
Learn moreOttomatiq is designed for licensed professionals who deliver services to individuals, prefer to accept Interac e-transfer as payment for their services and often need to provide a receipt for services they deliver to be used by their clients for insurance reimbursement.
Ottomatiq automates and monitors these tedious administrative duties so you can focus on building your practice and maximize your productivity.
